The dial will normally be fixed to the case or the movement.
When
attached to case: Where it is desired to remove the dial from the case, this
seldom involves more than a few woodscrews. In turn, the movement will be
secured to the case by woodscrews.
When attached to movement: First of
all, remove the hands from the movement as described in the section entitled
'Hand removal'. Many movements are secured directly to the dial by use of
tapered pins inserted diagonally through feet attached to the dial. Carefully
remove these pins (and no others) and ease the dial off. Be extra careful not to
remove any other pins at this stage as the mainsprings will still have power in
them. Enamelled dials are normally secured to a brass backing plate and this
whole plate should be removed. Take great care when removing the enamelled dial
from the plate (if absolutely necessary) because the action of bending the soft
copper wires on the back may cause the enamel on the front to chip.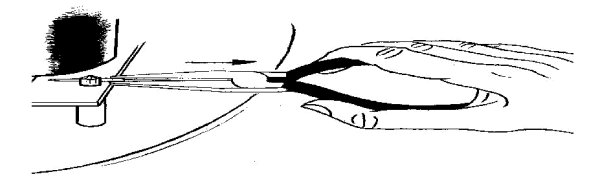
At this stage it is wise to collect up
all the parts and lay them carefully in the correct order. Make a note of how
they were fitted as they will not be needed until much later
on.
Warning
Never work on a clock movement with the
mainspring wound. A fully wound mainspring contains a tremendous amount of
potential energy which is safe if allowed to escape at a controlled rate. If,
for instance, the plates of a clock are separated with the springs wound, then
the energy will be released suddenly and may strip the teeth from a wheel or
remove the skin from a fingertip - you have been warned! Please refer to the
section entitled 'Letting down mainsprings'.