Dismantling a clock requires little effort and a few minutes - re-assembly
the opposite.
It is most important you find somewhere where you can lay
out the pieces as you remove them that will not be disturbed. Experienced clock
repairers recognize each part for what it is but until you are familiar you will
need to make notes and sketches as you go along. Timepieces are by far the
simplest to work on, with only a few parts involved.
Striking movements
need careful scrutiny before being dismantled to observe their striking
sequence. Make the most of this examination and take as many notes as you feel
you need. In particular, the strike mechanism will normally have a 'warning' a
few minutes before it strikes. On the hour the lever that was raised to give the
warning drops, allowing the striking sequence to proceed. The number of strikes
is counted by a wheel appropriately notched known aptly as the count wheel, or a
toothed rack raised one tooth per strike. The drop of the rack is controlled by
the position of the hour wheel.
Be certain that you understand how the
mechanism works, as this is far better than trying to use memory alone.
Before dismantling, it is essential that you let let down the power of the mainspring as
described earlier. Having done this, place the movement on the bench, supported
by two blocks of softwood or three of the Movement Clamps designed to hold movements while being worked
on.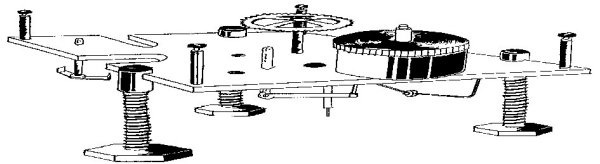
A movement supported by movement
clamps
If using clamps, cover the plates with a thin piece of card
so that the jaws do not mark the brass.
Begin dismantling by removing the
fittings from the back-plate first, namely the count wheel, hammer, bell stand
etc. These are normally attached by tapered pins or screws. Handmade clocks
often had handmade screws which only fit the hole for which they were intended.
Make a note of these peculiarities as it can be very frustrating to find you are
left with a screw towards the end of assembly that should have been used at the
very beginning.
Having removed the fittings from the back-plate, the
front plate may now be stripped down including the ratchets and clicks, striking
rack, motion work etc. Failure to remove all these items will make the plates
difficult to separate without disturbing the relative positions of the wheels
and levers. A novice will need to observe them carefully whereas an experienced
repairer seldom has need to hesitate.
The plates will either be screwed
to the pillars that separate them, or held in position by tapered pins. With the
movement on its back, gently ease off the front plate. Striking movements will
be seen to have two distinct 'trains' of wheels, only connected by a lever that
triggers the striking train when the hands on the going train pass the hour and
half-hour position.
When removing the wheels from the train, place each one
the correct way up and in the right position in a piece of expanded
polystyrene.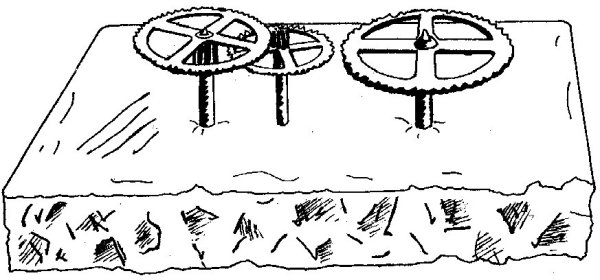
Parts placed in some polystyrene, in
their relative positions.
You will see that as the wheels get
further from the springs or weights, they and their pinions become lighter and
more delicate. The wheels on the striking side often have pins set into
them.
Remove the lines from weight driven and chain driven movements. It
is wise to replace gut or clock rope etc. if it shows any signs of wear. Not
only is it easier to replace now than at any other time, but breakage can cause
damage to the mechanism and case. If chain needs to be replaced, make sure that
the one fitted is correct before you order another with the same dimensions.
Check that un-welded links have not stretched. For rope replacement, measure the
internal distance between the pulley flanges inside the clock, not the
weight pulley. The rope should be as wide as the pulleys will take without any
friction occurring as a result of the rope touching the sides. If it touches, it
may also ride up and off the spikes.
At this stage it is wise to examine
all the wheels, pinions, pivots and pallets for wear.
Repairing Your Own Clocks by Mervyn Passmore